This article is an original from Muzzle Blasts Magazine, the oldest and best Muzzleloading and Living HIstory Magazine. NMLRA.org
Blending Fine Art, History, and the Outdoors with Traditional Craftsman Eric Ewing
Duelist 1954 Reviews : “Building the Daniel Boone Rifle” DVD
In this video I'll review what I think is the best video resource for building a flintlock longrifle...Mike Miller's DVD set on building the Daniel Boone Rifle.
The First Concealed Carry Pistol | Muzzleloaders at the SHOT Show 2020
As part of our ongoing coverage of muzzleloaders at the 2020 SHOT Show, today we’re showing you a selection of muzzleloaders from the NRA “History of Concealed Carry” exhibit. I didn’t expect a small museum to be at the center of the show, but it was a welcome surprise in a sea of modern “tacticool” equipment.
The German Ball Butt Dag, Circa 1630
Touted as the “First concealed carry pistol”, I feel this would only be concealed in the bulky pants of the 1600s.
As stated by the museum placard, “The earliest firearms- hand cannons and matchlocks- relied on a slow burning match or other smoldering ember for ignition.
The Wheellock was the first mechanical lock, circa 1500. It allowed a gun to be carried with a wound spring, loaded and ready to fire. Some attribute this design to Leonardo Da Vinci.”
I mean, who doesn’t like wearing curtains to the court? Image Credit
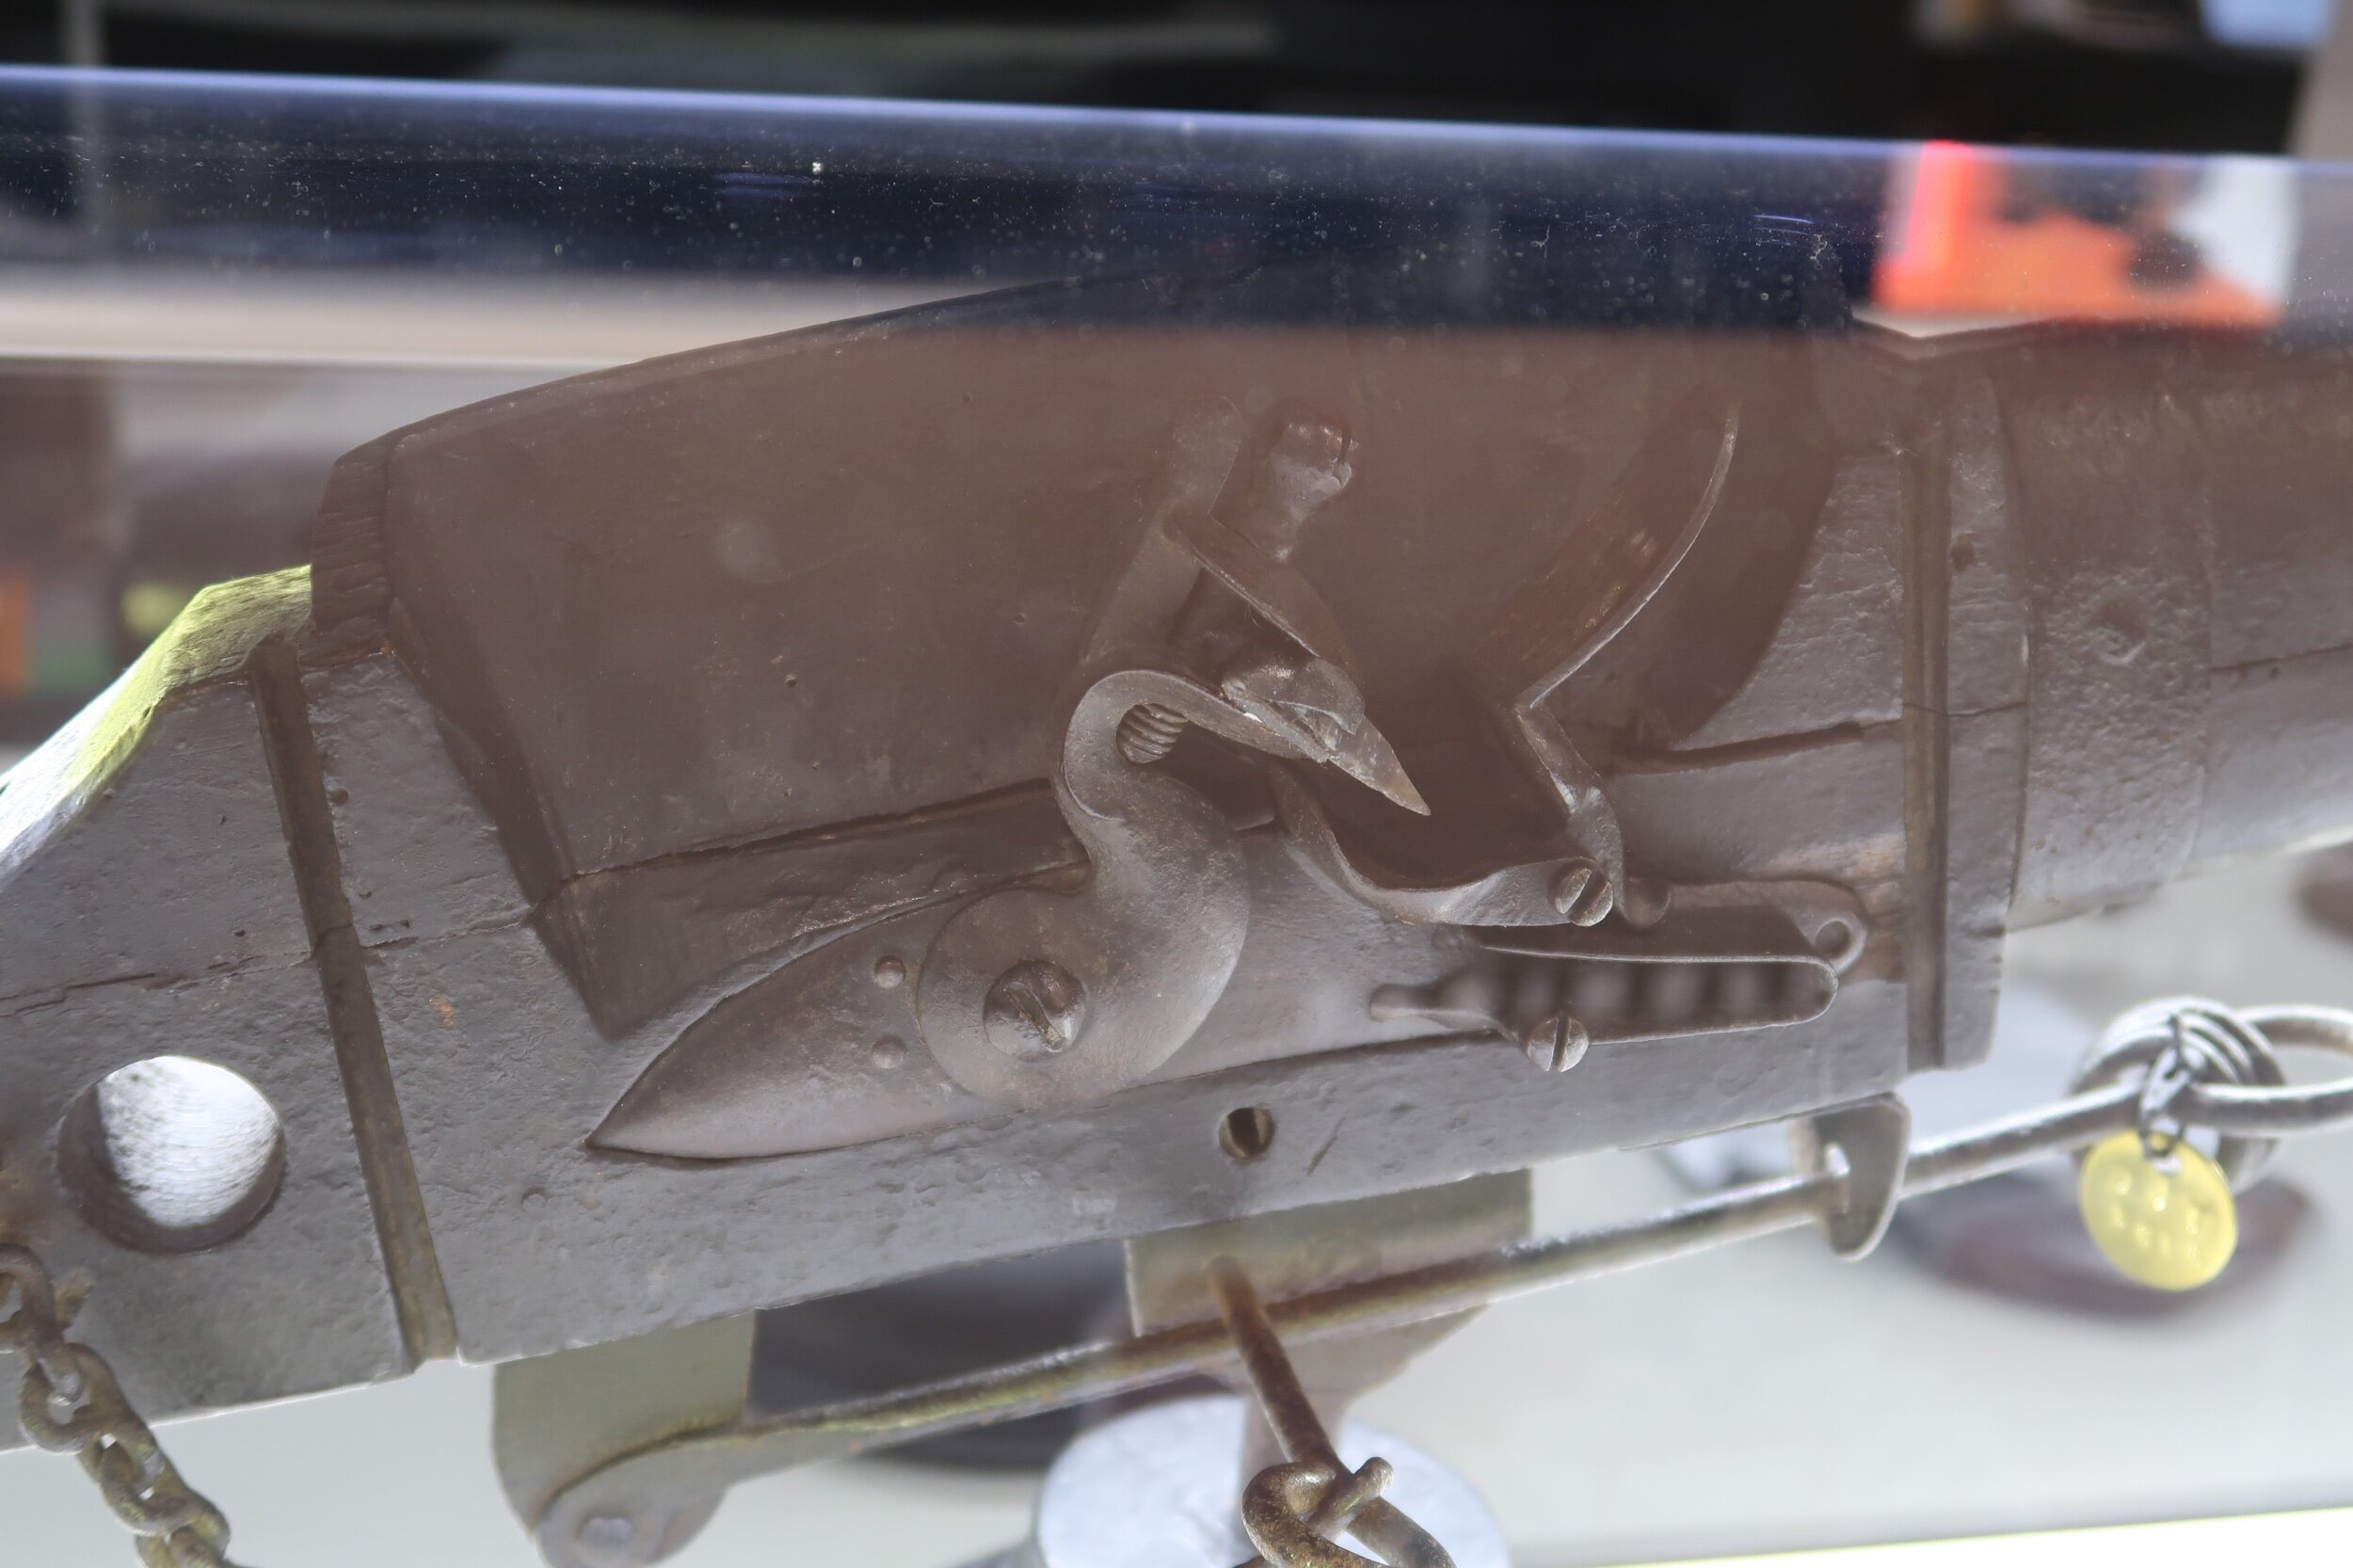
A detail of the wheel lock mechanism, note the worn engraving on the wheel and lock plate.
The name sake featured in this photograph, “The Ball Butt” is carved with scrimshawed ivory or bone inlay
Note the face carved into the inlay around the tang, a common motif for the time.
What’s the best for oiling black powder guns?
Load Development for your Flintlock Squirrel Rifle | Black Powder TV
It’s Monday, which means Black Powder TV released a new video yesterday! This week, follow along as Bob begins developing a blackpowder load for his .36 caliber flintlock squirrel rifle. This rifle is built from a Kibler “Southern Mountain Rifle Kit”, one of the more popular DIY muzzleloader kits we see!
If you are interested in building your own kit muzzleloader, learning how to develop loads for your muzzleloader, or just want to enjoy some blackpowder fun vicariously, be sure to watch!
We are excited to be working with content creators like Black Powder TV and the Black Powder Maniac to promote not only the NMLRA, but our love for muzzleloading and living history so it may last for generations to come.
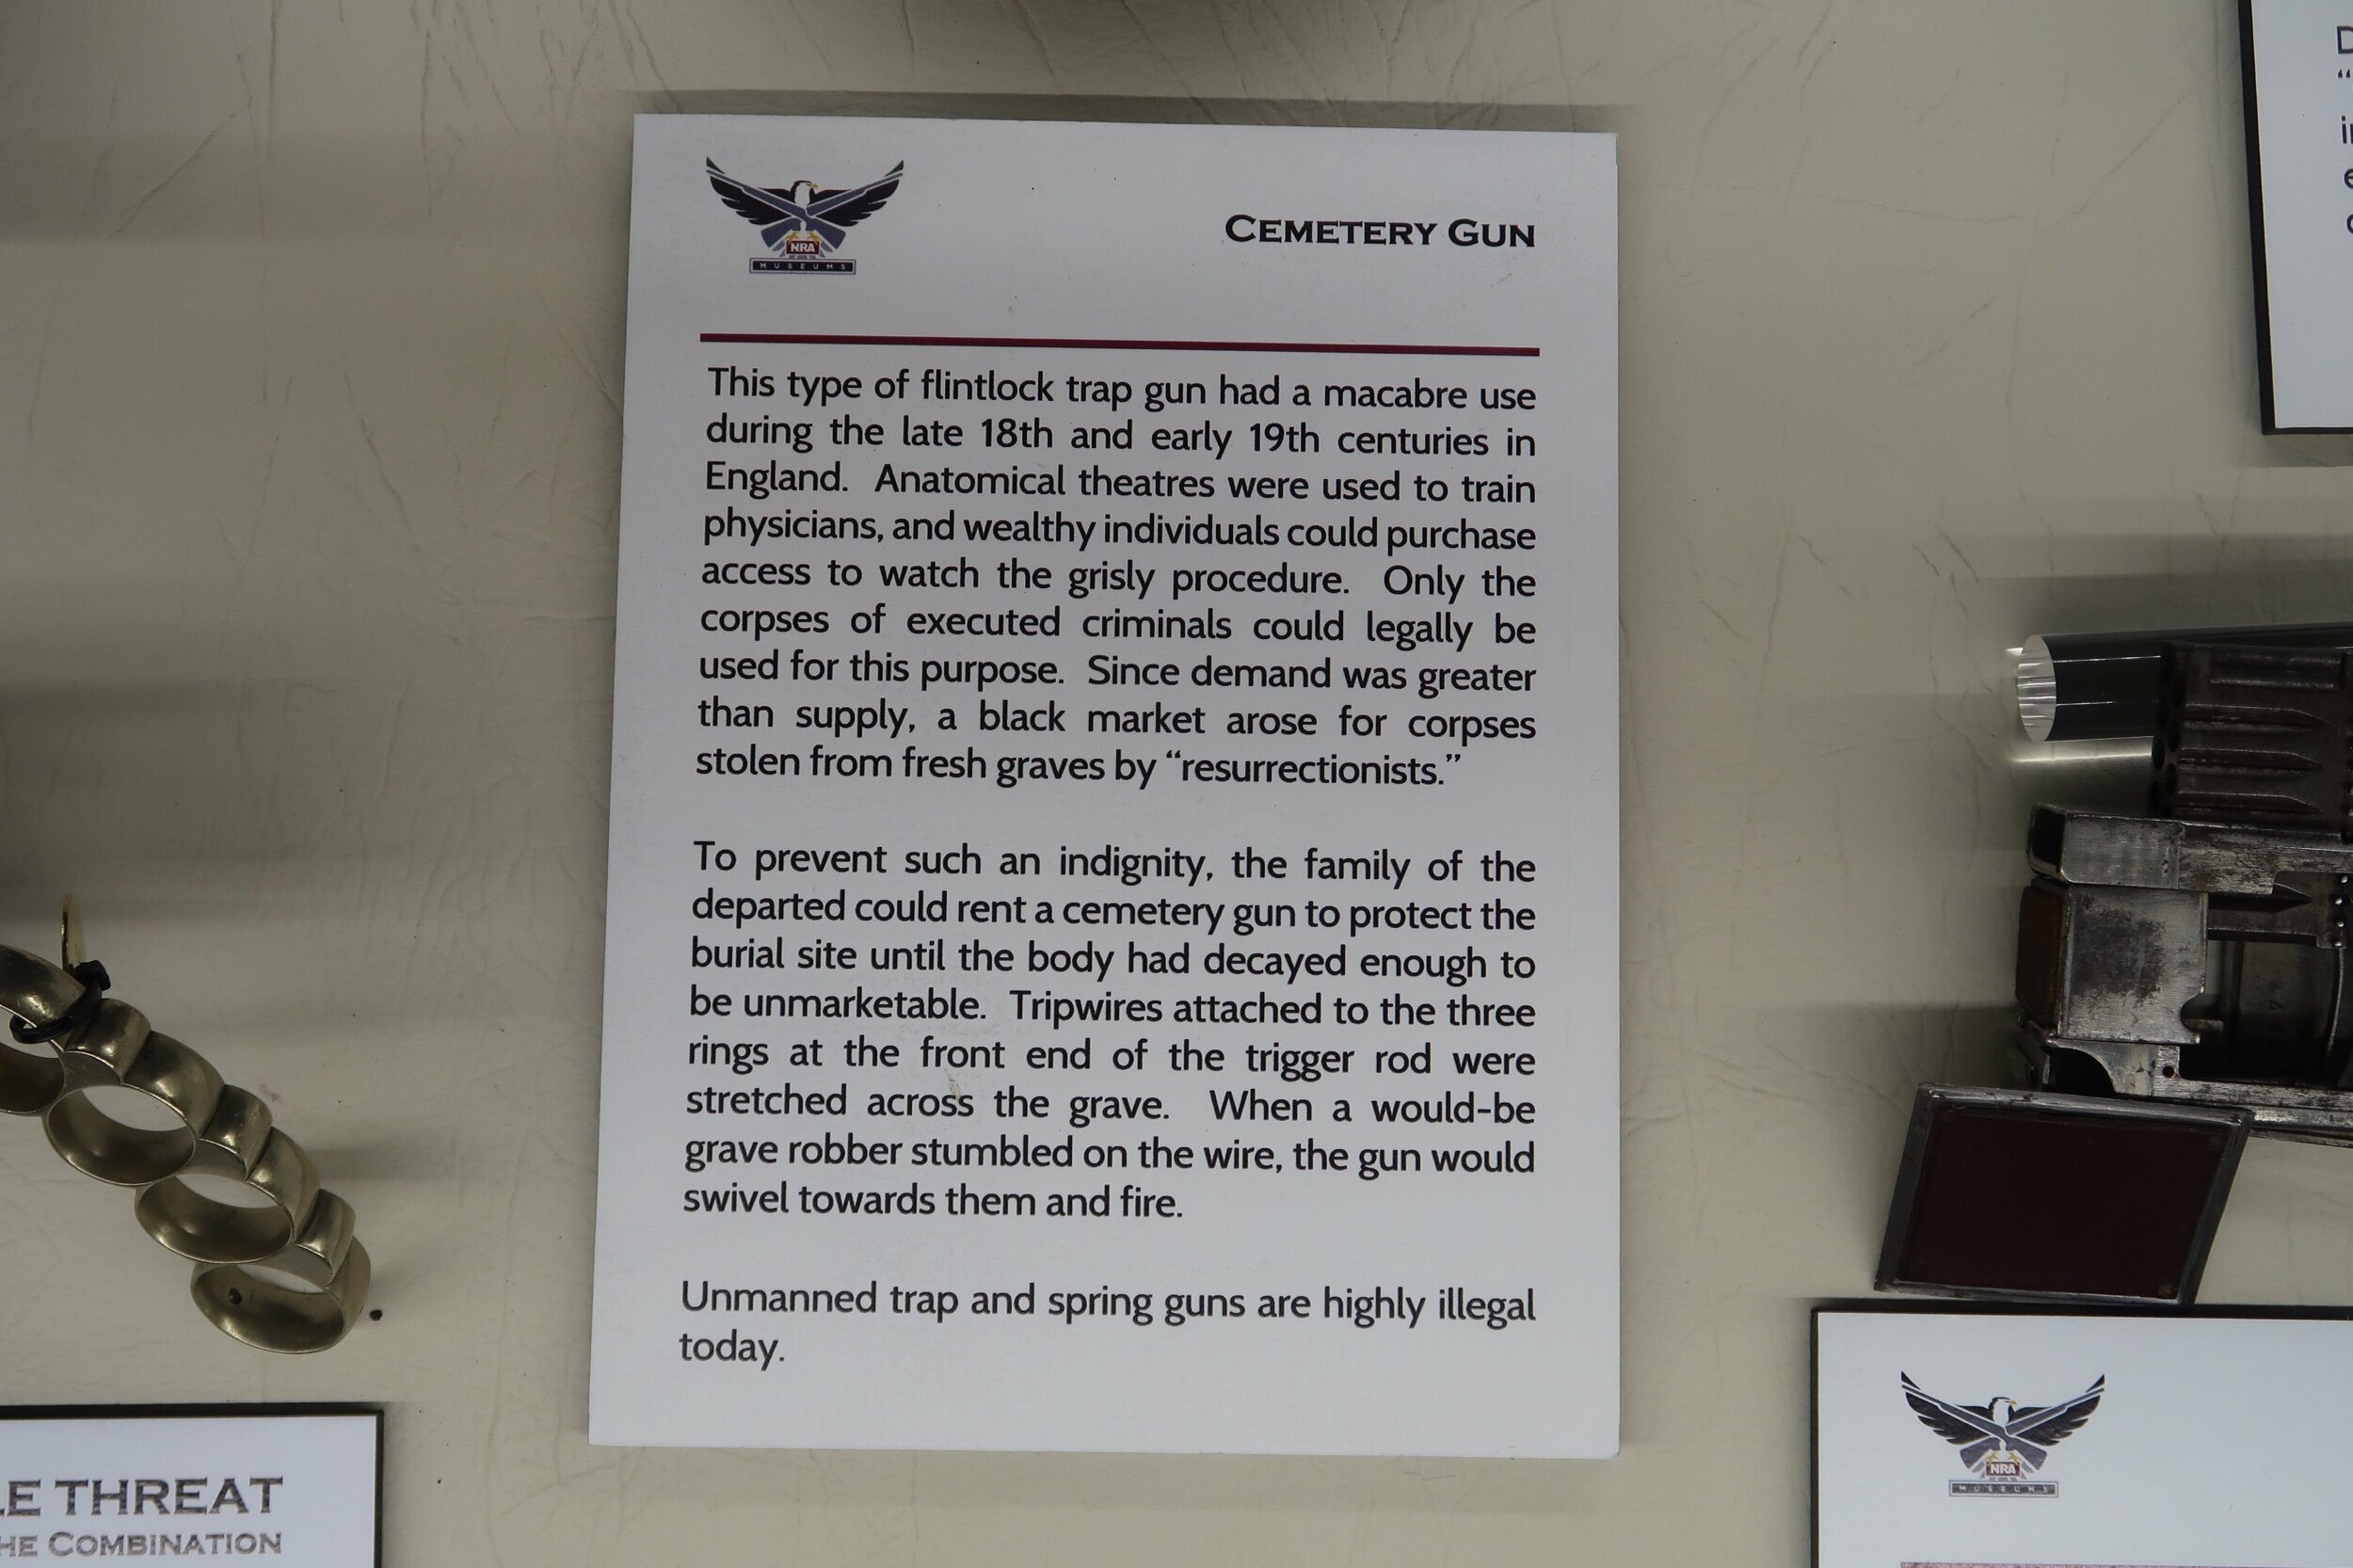
How to stop grave robbers in the 18th century
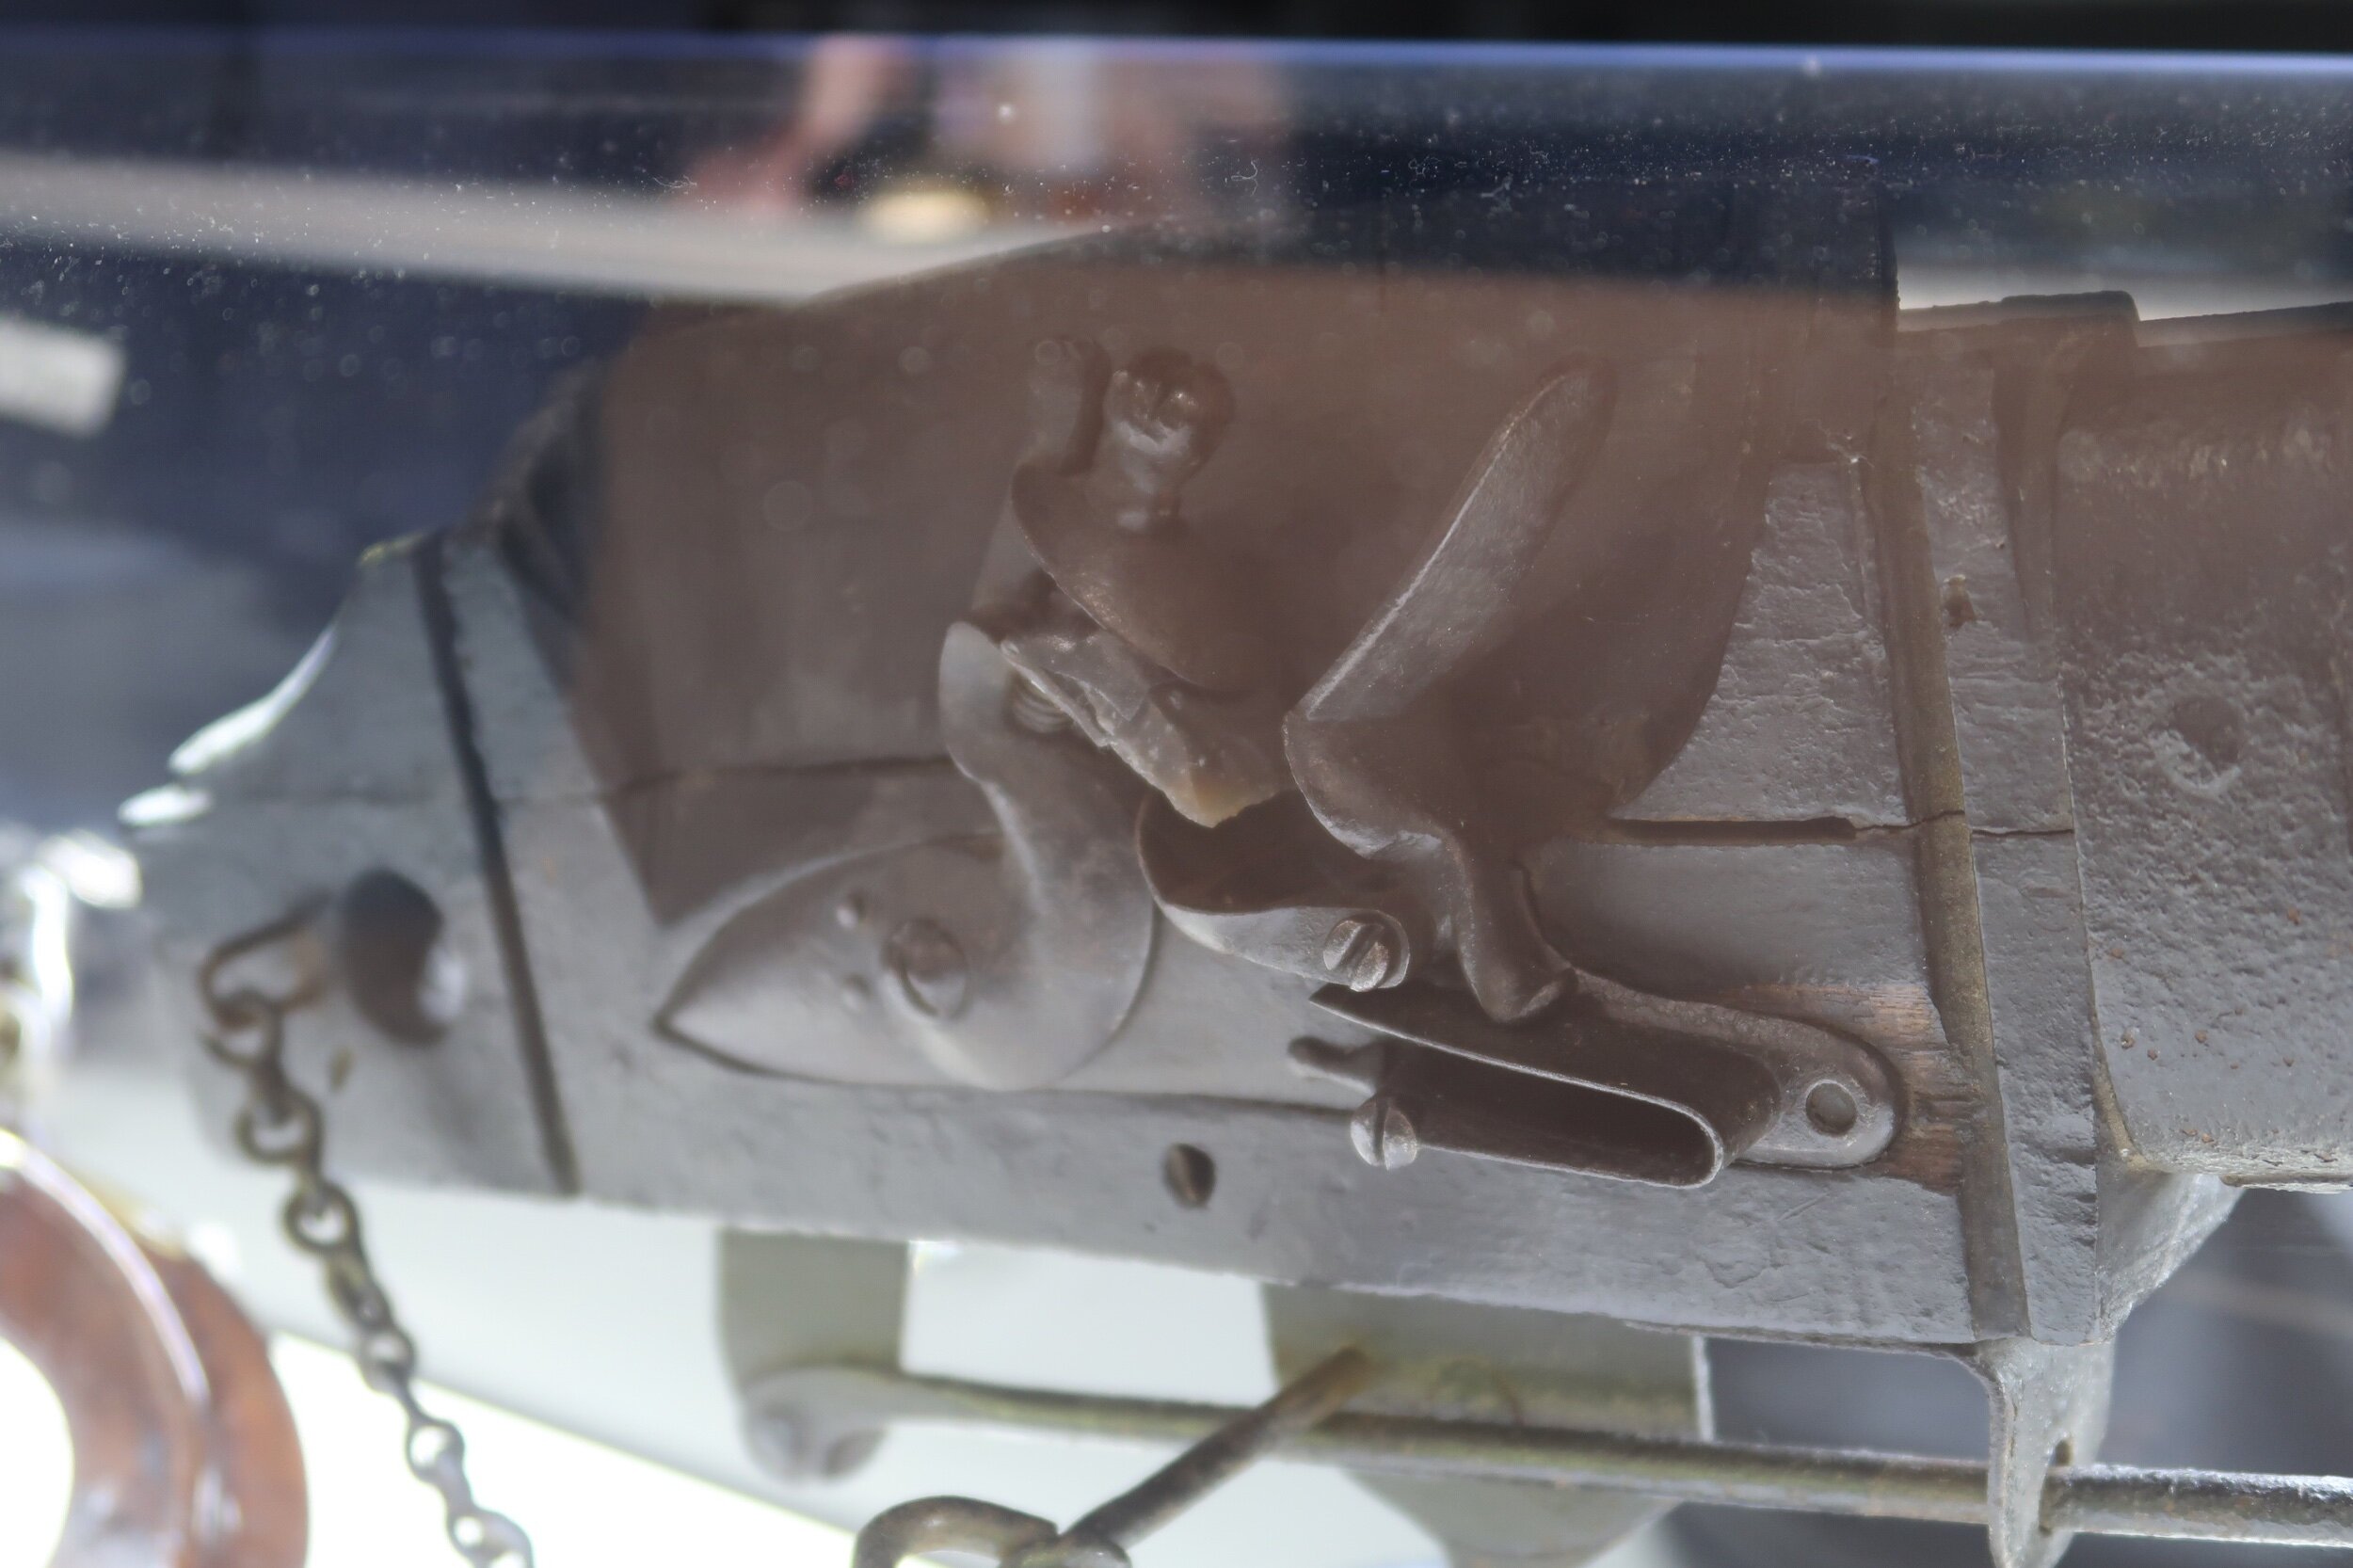
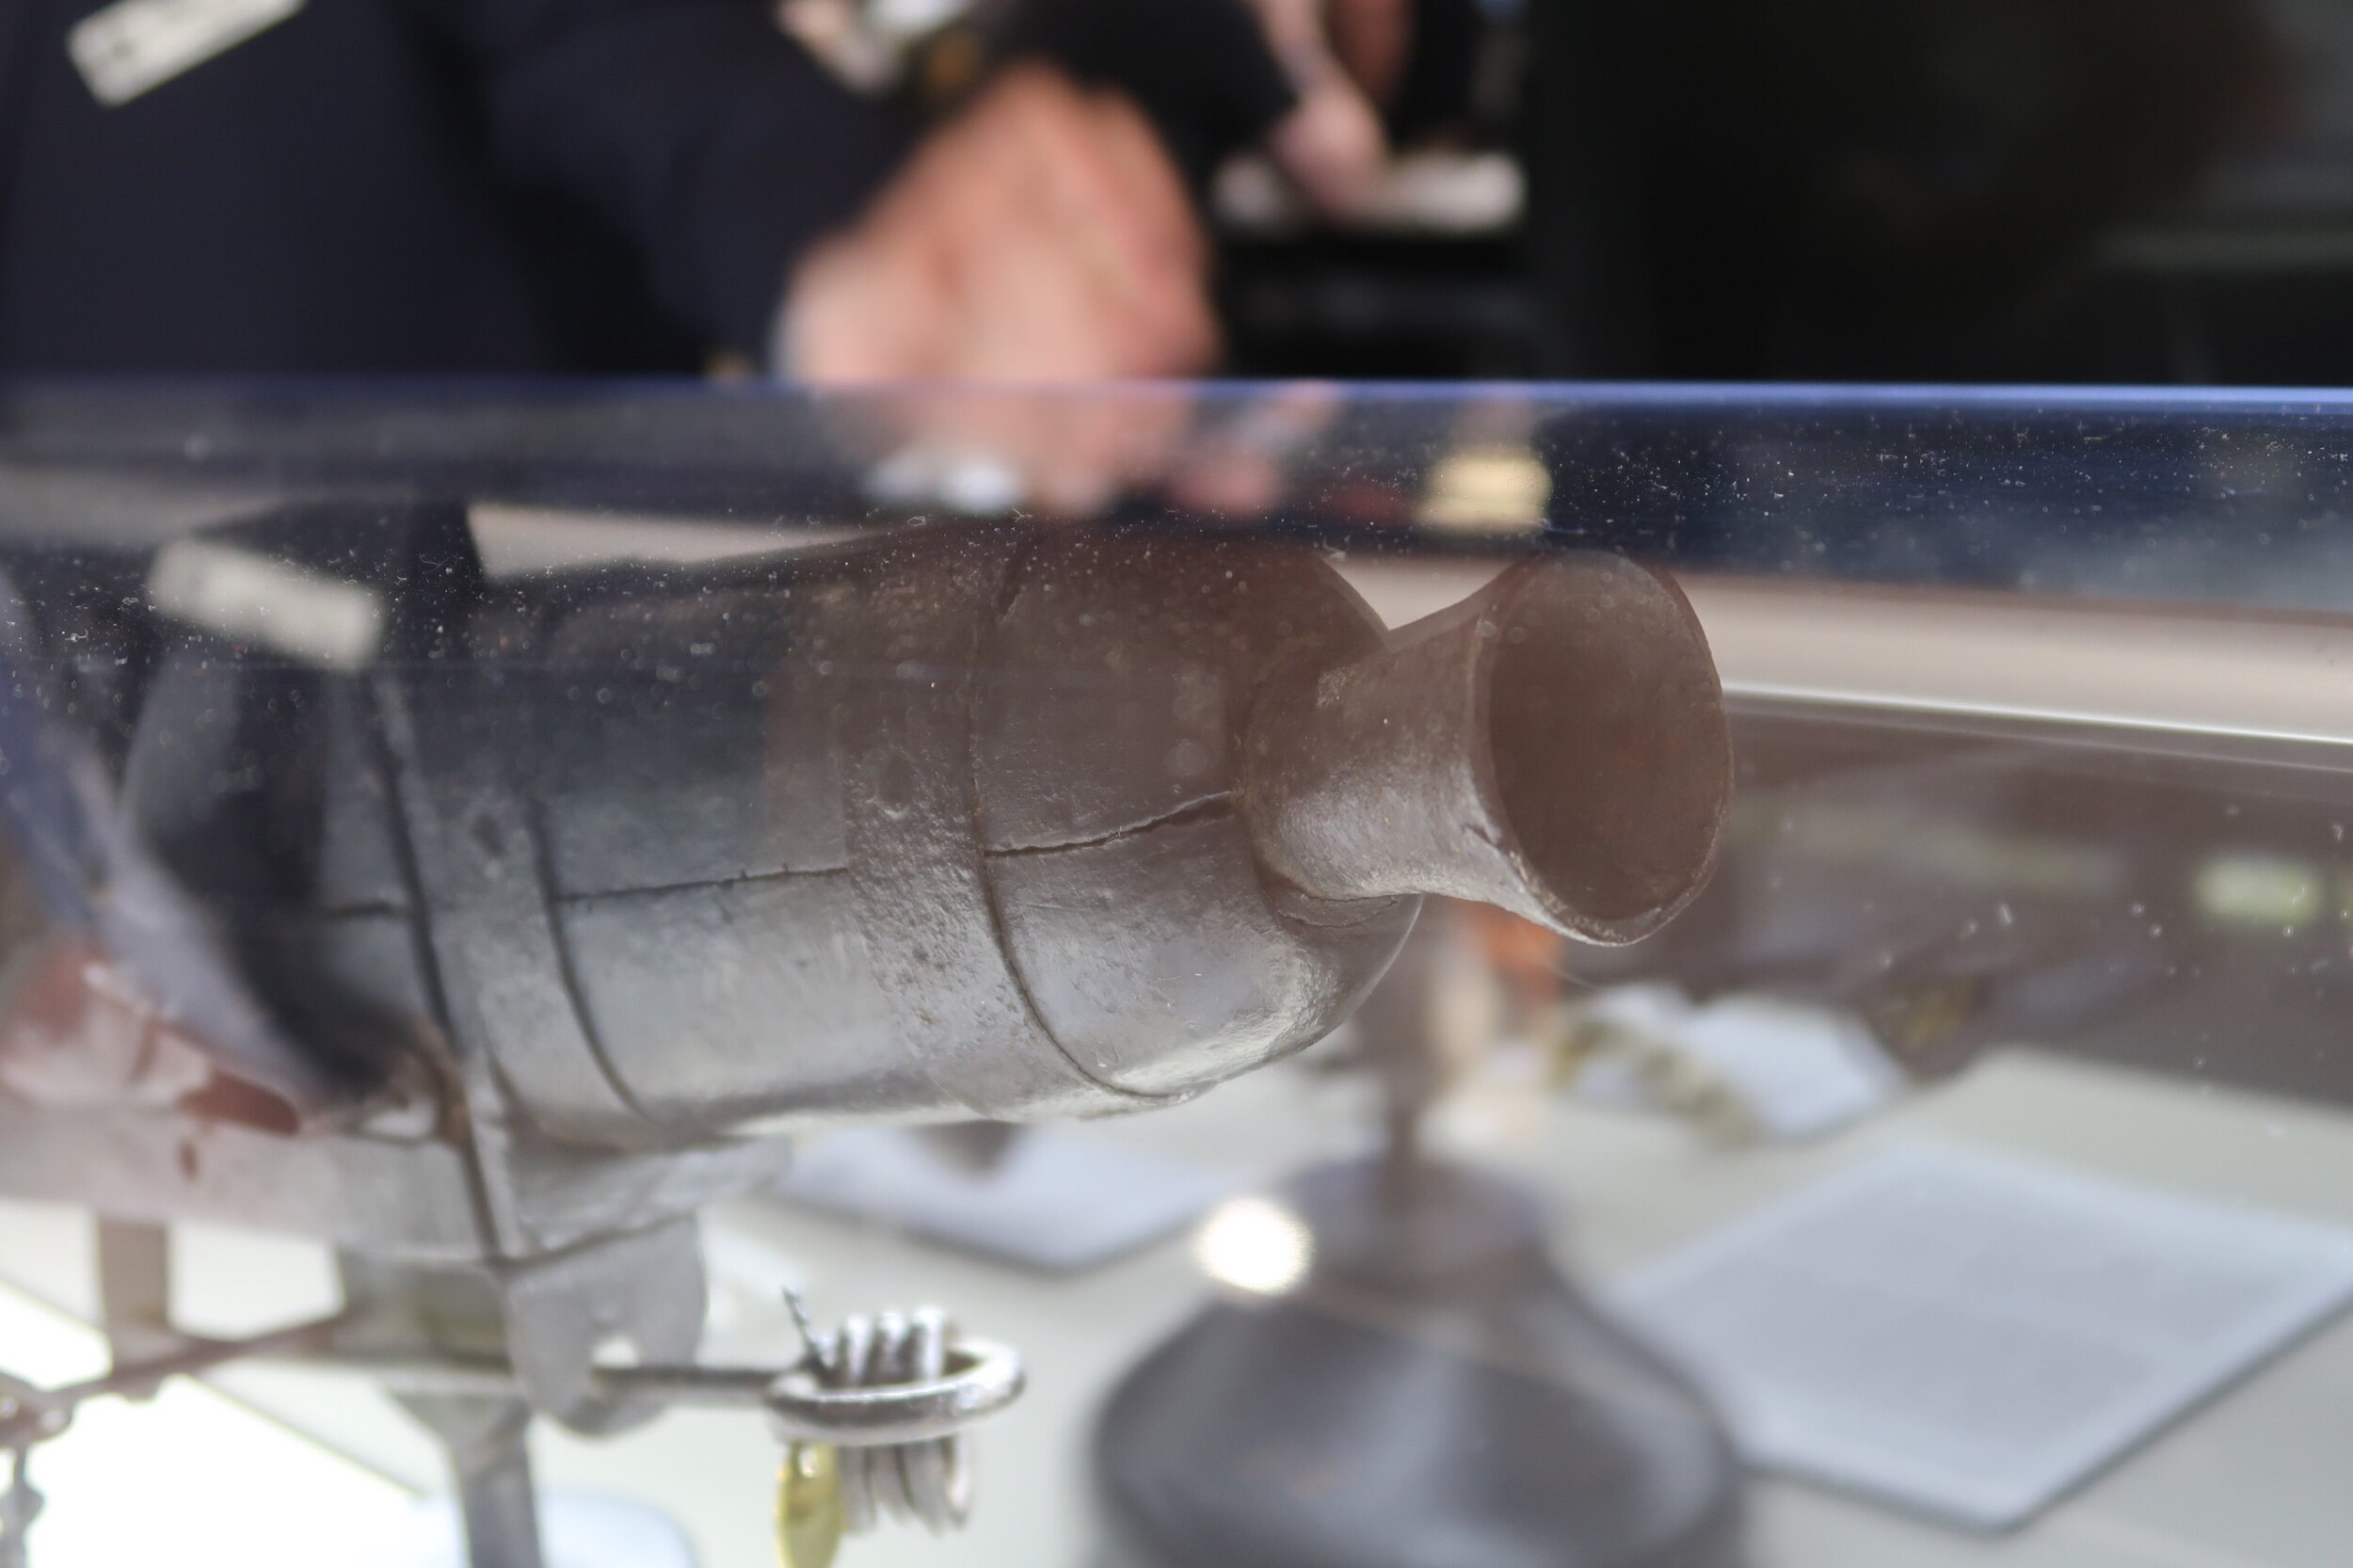
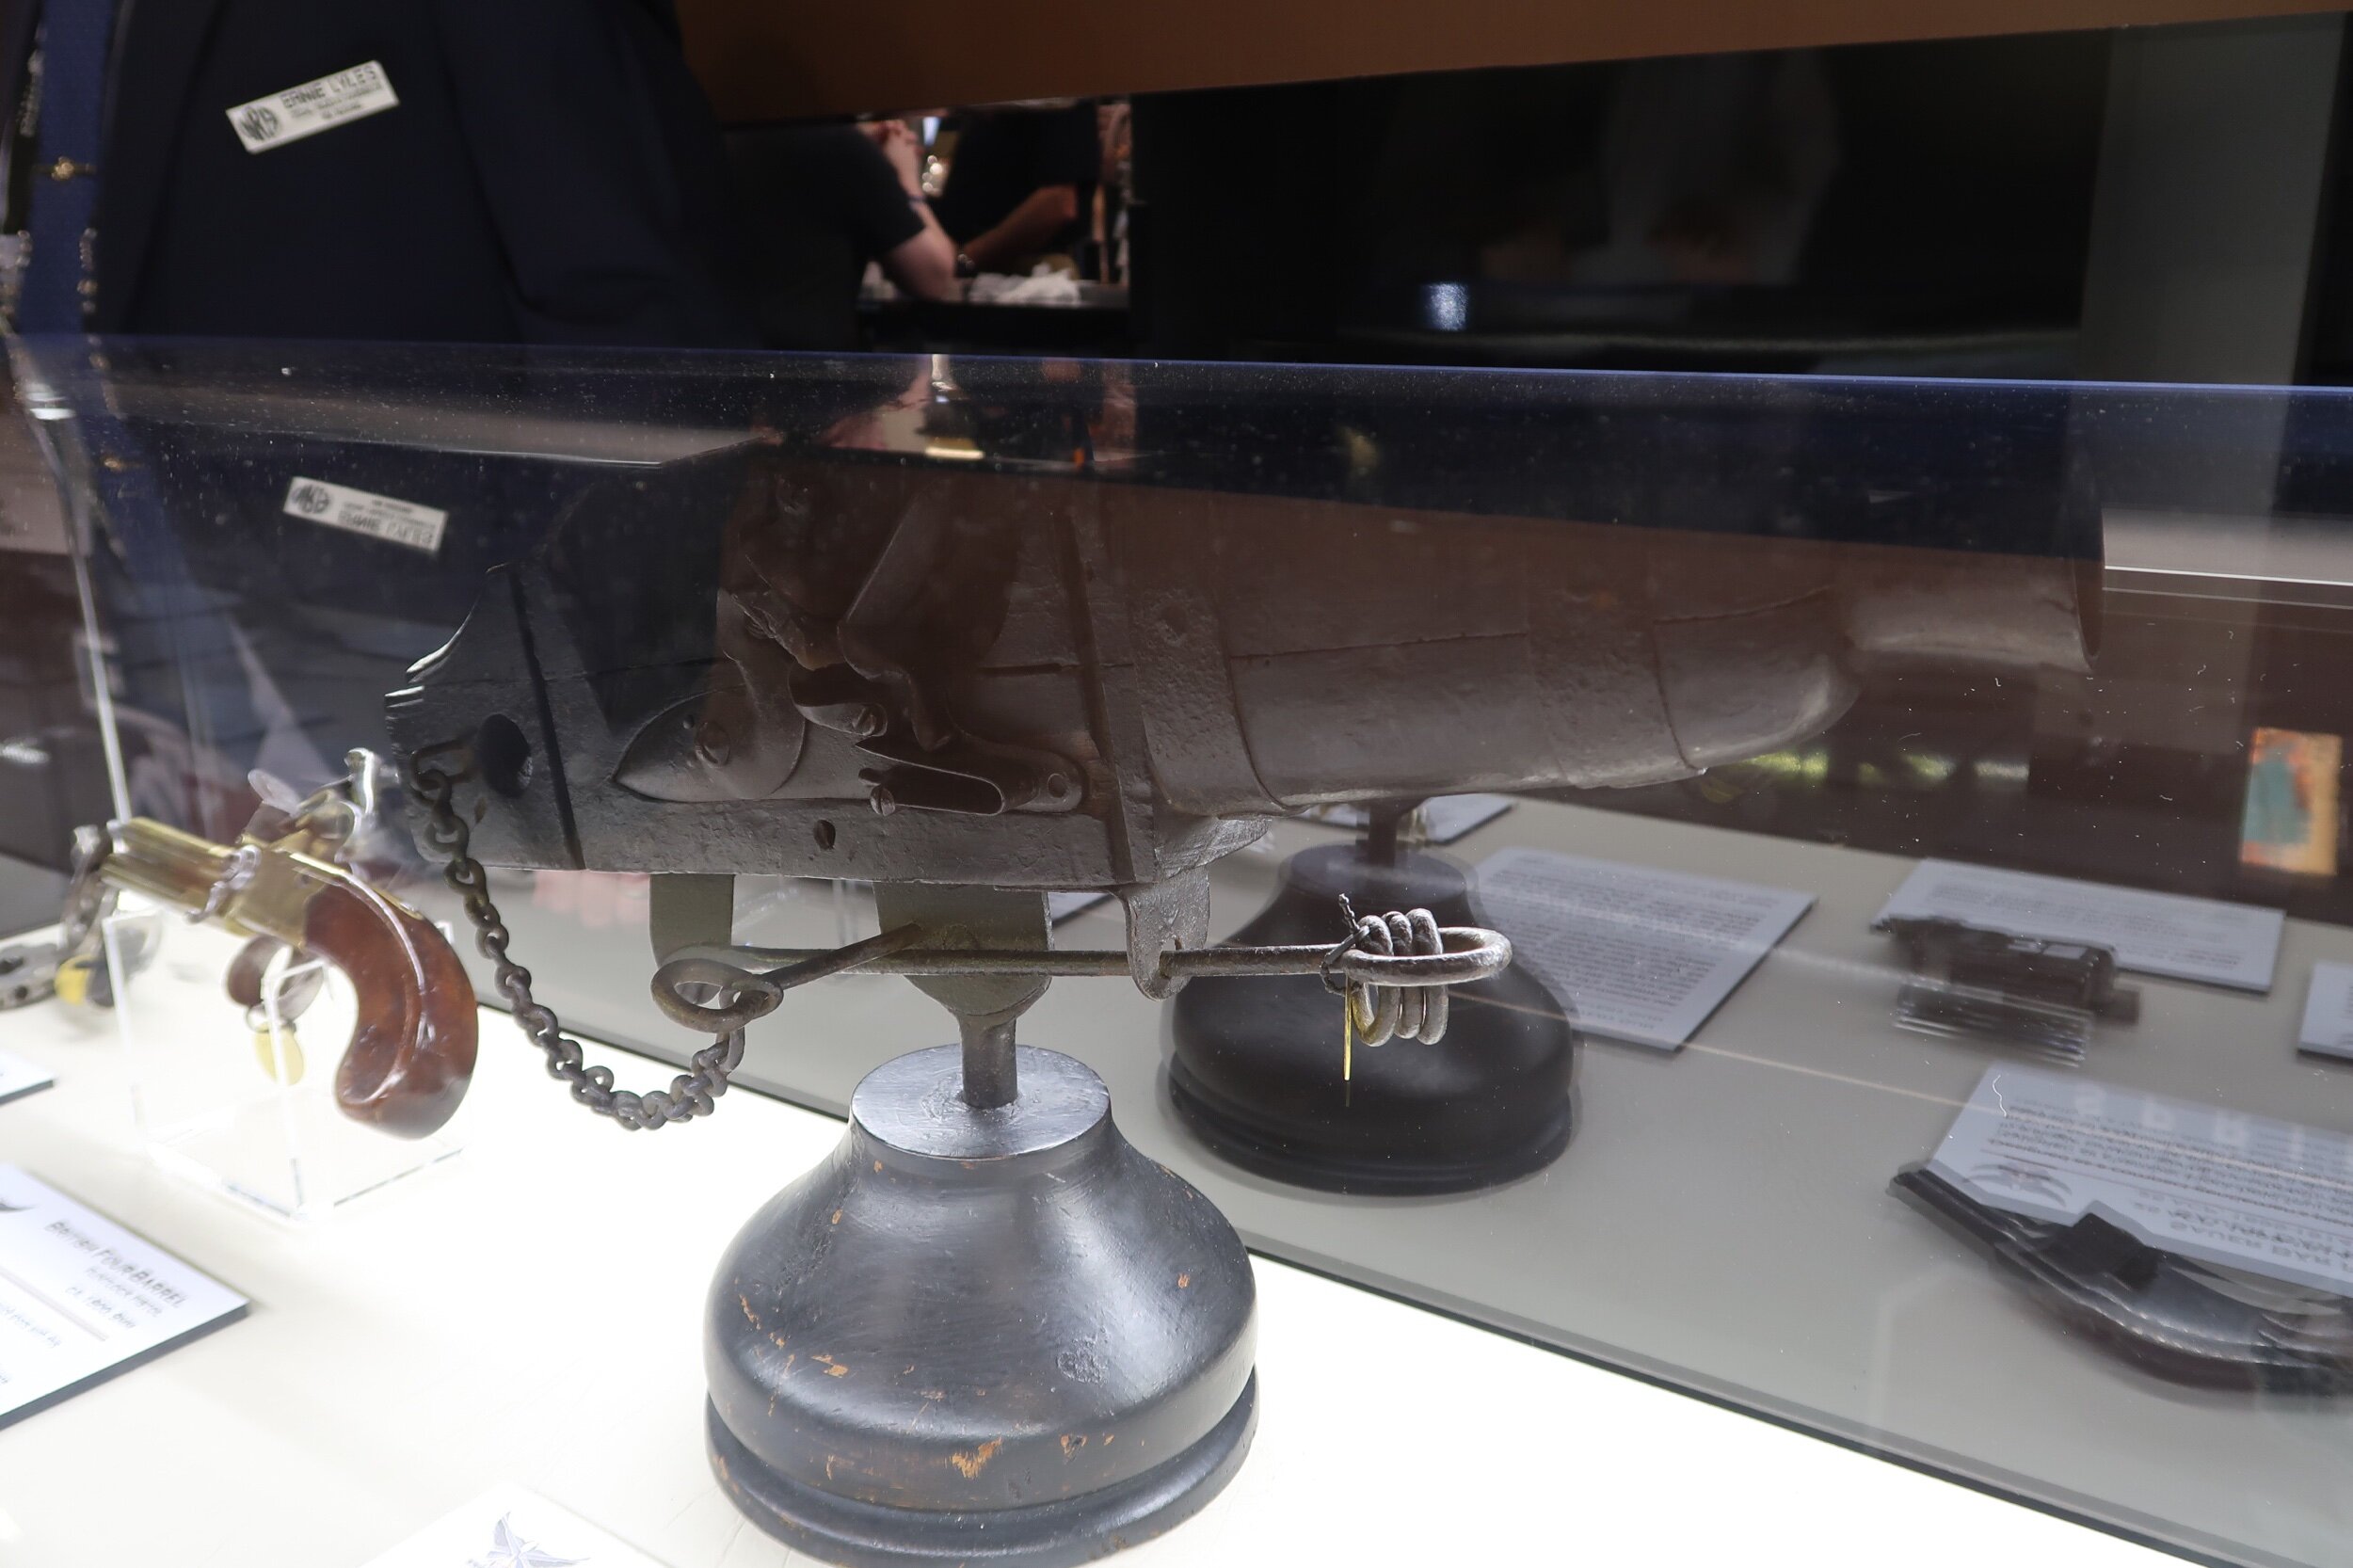
Happy #flintlockfriday! Here’s a look at a flintlock I’ve never seen before. This is an English “Cemetary gun”, used to keep grave robbers away from your newly deceased relatives during the height of medical “study” in Victorian England.
Mounted on a swivel, this beast of a muzzleloader would be tied to trip wires that, when tripped, swung the muzzle in the direction of the thief and sent a lovely lead gift their way.
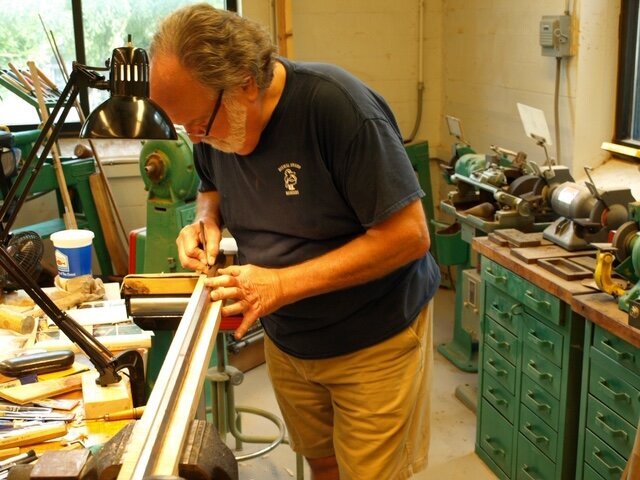
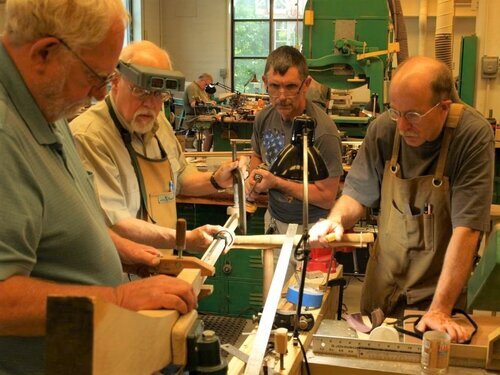
Don’t miss out on this year’s NMLRA/WKU Gunsmith Seminar!
Time is running out to register for the 2020 NMLRA/WKU Gunsmith Seminar. We currently have openings in the 6-Day classes and just a few in some of the 3 & 9-Day classes.
Deadline to register is February 19, 2020. As we have very talented and dedicated Instructors, this is an event you do not want to miss!
Learn more at NMLRA.org
39th Annual NMLRA/WKU Gunsmithing/Longrifle Seminar
Wednesday June 3rd through Friday June 12th, 2020
At Western Kentucky University
Bowling Green, Kentucky
Announcing the NMLRA Reenactor Directory
We are working to build an up to date directory for Reenactors and Living Historians in the United States. This includes Military Groups, Historic figures, and Demonstrating Craftspeople.
If you'd like to be included in our directory, please fill out the form on our website and we will get you added and promoted!
There is no fee to submit or be promoted, we only want to help events find reenactors and reenactors find events.
Go to the link below to submit the 4 question form and be included in our directory and promtional queue.
How to make your own Inletting Chisel | DIY Muzzleloader building tools
Lyman Black Powder Recall Notice
We know Lyman is a popular manufacturer for many Black Powder Enthusiasts, please take time to read this information and check your Lyman Product Serial numbers to ensure you are operating your black powder firearms safely!
Lyman Products Corp. (“Lyman”) is voluntarily recalling black powder rifles and pistols due to the potential of separation in the breech plug. Lyman maintains a safety-first approach, so despite finding only a few firearms affected and no reported injuries, we are offering a recall program to have the issue corrected. Lyman regrets the inconvenience but remains committed to the safety of our customers.
This recall includes black powder rifles and pistols regardless of caliber (including Deerstalker, Great Plains, Great Plains Hunter, Trade Rifle, Plains Pistol, Black Powder Kits, and replacement barrels; excluding Percussion Left Hand Great Plains and Left Hand Great Plains Hunter models) manufactured from March 1, 2017 to December 22, 2017. Barrels with the serial number in the range of A595960–A599026 are subject to this recall.
On their Website, Lyman details 4 simple steps to make sure your Lyman products are safe on the range. Please follow this link to go through the steps.
Safety is our utmost concern here at the NMLRA. Regardless of if your muzzleloader is affected by this recall, please know and understand the dangers of black powder firearms.
Help with Chronographing my 52 caliber Bench Gun | Ask the Experts
Questions and answers from the NMLRA Facebook Group
“Does anyone have experience using a chronograph with muzzleloaders. I concerned with the unburned powder flash, patching and the smoke's impact on equipment and actuate readings. I have heavy and light bench guns, both .52 calibers that I was thinking about testing But would hate to cause damage to the equipment.s.”
-Chris West
Here are some of the most informative comments from the post.
Tom McEWen said, “I have a tripod mounted and a bayonet style. I have used the tripod style (Caldwell) with no issues. I will not use the bayonet style with a Muzzleloader (again)”
Robert Wetzler - “shooters used to use one put cardboard in front of screen”
Carl Hill Chronograph my 4 bore with a 1500gr. Ball, worked but i’d suggest moving it at least 15 yards away from the muzzle
Terry Sensenig - “I put a small piece of wood over the digital readout to minimize the shockwave. Other than that I feel like I get consistent readings with muzzleloaders. Prior to shooting muzzleloaders I will shoot a pistol through just to make sure the equipment is reading correctly”
Rick Weber- “I ruined a chrono with a felt wad. At 1500fps the conical traveled thru the wire way, but the wad hit face of the display- maybe 25’ away. Bought a LabRadar a few years ago, no problems.”
Ed Radzinski “I use a chrony, don't use skyscreens. Just put a piece of plexiglass over it. Works great.”
If you’d like to join in on the conversation, head on over to our NMLRA Facebook Group! The group is open to anyone who is interested in Muzzleloaders and living history as long as they follow the rules.
Find out more about the NMLRA
Duelist1954 Builds a York County Flintlock
Popular muzzleloading and black powder youtuber Duelist1954 has been working on building his own York County Flintlock for a while now. In case you’ve missed it, he’s uploaded part 17 this week focusing on his process of inletting the butt plate.
Developing a load for Lyman Great Plains Hunter Rifles
Questions and answers from the NMLRA Facebook Group
“Does anyone have experience with Lyman Great Plains Hunter rifles? I am looking to get one as a pure hunting gun and wanting to load 250-300gr sabots. Typically using Barnes TEZ/TMZ. Just looking for accuracy, load info, and even some cool game pictures!
-Andrew Ault
Andrew’s question brought up 30 comments one evening. We wanted to share some of the comments, hope it’s helpful!
Here are some of the most informative comments from the post.
Photo Credit to Ted Davis. Lymans Great Plains Rifle 1 in 66 twist. Also comes in Flintlock
“I'm not familiar with the "Great Plains" model, and I don't know the twist ratio. But Lyman had made a model called "The PA Hunter". "PA" stands for Pennsylvania. The rifle had a 1 in 66 twist for roundball. This was produced because the Pennsylvania "primitive" hunting season required a muzzleloader which had flint ignition, open sights, and fired a single "spherical" projectile of .50 cal or greater.
The laws in PA have since changed and the cal is now .45 or greater, and conicals can be used. Flint ignition and open sights are still the rule. Lyman discontinued the PA hunter.
Pennsylvania also has a "muzzleloading" season (which is earlier) when in-lines, and percussion ignition can be used with peep or optical sights” George Hunter”
“My Great Plains 54 is 1:72, I think. For target I use 50 grains of FFF and a hand cast .540 round ball, patched .015. If I decide to hunt deer with it, I up my powder charge to 80 grains. Same with Deerstalker 54. Only the hunting load is 70 instead of 80. Shorter barrel. Both are proven to harvest Michigan Whitetail.” Craig Chambers
Bill Bolen adds, “I have only ever shot bullets in my GP .50 cal and used it to kill a bunch of deer. I have used the Hornady copper jacketed 280-300 gr, Powerbeats, and many others. All shoot pretty well out to 100 yards or so. Lately I have switched to a Great Plains 300 gr all lead that shoots about the best. My hunting load is 90 gr 2f Goex.”
If you’d like to join in on the conversation, head on over to our NMLRA Facebook Group! The group is open to anyone who is interested in Muzzleloaders and living history as long as they follow the rules.
Find out more about the NMLRA
The Ashley Hawken Part I - Muzzle Blasts Archives
By Bob Woodfill
The Ashley Hawken was built specifically for General William Henry Ashley, by Jacob and Samuel Hawken, to defend his keelboats from hostile Indians, as the fur traders went up the Missouri River to establish trading posts. The rifle needed to be capable of shooting farther than the trade guns used by the Indians, who would often shoot down from the overhanging banks along the river, as the keelboats passed. Therefore, a ‘Super Hawken’ was built that could throw a one ounce ball with accuracy beyond 200 yards.
The year was 1822. General Ashley and his partner William Henry, had placed the famous advertisement in the St. Louis newspaper on February 13, for “one hundred enterprising young men, to ascent the Missouri River to its source and be employed for one to three years trapping for furs”. The men who responded to the ad eventually became the who’s who of the American fur trade, including such greats as Jim Bridger, Hugh Glass, Jedediah Smith, William Sublette, David Jackson, James Clyman, Jim Beckwourth and Thomas Fitzpatrick
In April 1822, Henry and the free trappers, who responded to the newspaper advertisement, ascended the Missouri River to the mouth of the Yellowstone River in a keelboat, and later established Fort Henry near the Montana-North Dakota state line. A second boat with their supplies for the winter left St. Louis one month later, but sank only 300 miles up river from St. Louis. A dispatch was sent to General Ashley in St. Louis who in 18-days, obtain credit and assembled another supply boat. This time Ashley went with the supply boat and arrived at Ft. Henry in October. Able to supply the fort, he left Fort Henry and returned to St. Louis to prepare for the 1823 season.
Keelboats, which displaced only about two feet of water, were often used by the fur traders on the shallow waters of the Missouri River. They were usually from 40 to 80 feet long, and were built with a strong central keel that helped deflect obstacles in the shallow water. Except for a rare day in which the sail was useful, they were either rowed, poled or pulled upstream by the crew of 20 to 30 men.
Swivel cannons were often utilized on river boats for short-range defense. They ranged from 18” to 36” in length and had a smooth bore from one to two inches in diameter. This bore was quite suitable for a hand-full of musket balls, but only effective for short-range defense. The Lewis and Clark Expedition of 1804-1806 had a swivel gun mounted on the bow of their keelboat by Captain Clark, but it was never used.
It was probably during the winter of 1822/23, after returning from his first trip up the Missouri River, that General Ashley commissioned the Hawken gunsmithing shop to build a Super Hawken, to help combat the continuing harassment of his keelboats by the Indians. The gun was to be designed for long-range shooting, and capable of reaching with accuracy the numerous river bluffs, which lie above the Missouri River.
We know only three things for certain about the Ashley Hawken from information given in a 1882 newspaper interview with Sam Hawken. First, it was built by the Hawken shop for General Ashley. When Sam Hawken gave the newspaper interview, he was 90 years old, and was very ‘inclusive’ in his remembrance of the early years. In 1821 Jacob was listed in the first city directory as a gunsmith. Sam arrived in St. Louis on June 3, 1822, a year later. Sam simply recalled that “We supplied the gun to Ashley”.
I don’t believe that it has been pointed out before, but this rifle would have been J.&S. Hawken rifle Serial #1, or the first rifle built with the combined talents of both Jacob and Samuel Hawken. In the newspaper interview, Sam called it a “Super Rifle”, because it fired a one ounce ball from a three and one-half foot long barrel. These basic specifications leave considerable room to speculate about all of its features, but some other clues can help us determine its probable configuration.
Jacob Hawken came to St. Louis in 1819, after working from 1808-1818 at the Harper’s Ferry Arsenal in Virginia. He was very familiar with the strong and weak features of the U.S. Model 1803 Harper’s Ferry rifle and later models of U.S. Government rifles. He watched as brass fittings gave way to stronger steel fittings. The caliber of the Government models was increased to 69-caliber to extend their effective range. The barrels of the latest 1821 Models were round and a full 42” long.
.
When Jacob Hawken came to St. Louis, he and James Lakenan, another gunsmith who had worked at the Richmond, Virginia armory, shared a log house from 1820 to 1825. Jake, and later Sam, were both influenced by the Virginia gunsmith James Lakenan, and the iron-mounted rifles which originated from the Virginia region on the east coast. The Super Hawken that was to be built for Ashley would naturally be the product of Jake Hawken and James Lakenan’s experiences during their many years working at the armories.
A fourth, and often unmentioned feature of the Ashley Hawken, is that it was a flintlock. Irrespective as to when the percussion cap was originally invented in Europe, they were first seen on the east coast in 1825/26, and later first advertised for sale in St. Louis in 1831. The Ashley Hawken predated the introduction of the percussion cap in the St. Louis area, and it was a flint ignition rifle. Because of Jake’s familiarity with the 1803 through 1821 U.S. Government rifles, he would have probably chosen one of the large and dependable flint locks that were used on the U.S. Springfield musket models.
As reported in the August, 1976 issue of the The Buckskin Report, there was an earlier attempt to build a rendition of General Ashley’s 69-caliber flintlock Hawken. Such notables of the time combined their talents to make John ‘Dinglehoofer’ Baird a copy of Ashley’s Hawken. They were Andy Baker (stockmaker), Bill Large (barrel maker), Tom Dawson (flintlock), Bob Roller (triggers), Jack Haugh (trigger guard), Bill Fuller (buttplate), Randy Cochran (wood) and Tony Lageose (engraving). The finished rifle weighed 11.75 pounds and boasted a 37-1/2” long octagonal barrel with a thickness of 1.1875” at the breech and 1.0625” at the muzzle. The full-stocked rifle was exhibited and fired at Friendship, IN with a 0.690” diameter round ball, a 0.016” thick denim patch, and 160 grains of GOI 2FFg black powder. Its power and recoil were impressive…!
Pictures of this rifle shows its styling be more representative of an early J.&S. Hawken full-stocked rifle with iron fixtures. I believe that a better interpretation of the original rifle can now be made. Before starting my recreation of Ashley’s Super Hawken, I consulted with Don Stith, Bob Roller, and other Hawken bugs of today. The following is my reasoning for selecting the rifle’s basic components.
Caliber--In Sam Hawken’s 1882 newspaper interview, he says that Ashley’s Hawken threw a one ounce ball. Technically, a one ounce ball would weigh 437.5 grains or be about 0.660” in diameter. In the literature, I have seen the caliber quoted from everything from 66 to 69-caliber. The U.S. Springfield Musket--Model 1821, the last flintlock musket procured by the U.S. Army, was a 69-caliber smooth-bore. I believe that Sam’s reference to a ‘one ounce ball’ would refer to the 69-caliber ball which was the norm of day, and used in the most advanced long-range muskets made prior to 1822.
Barrel--According to Sam Hawken, the barrel was three and one-half feet (42”) long, or the same length as the U.S. Springfield Musket--Model 1821. This length of barrel would be required to get adequate velocity from a 69-caliber ball for long-range shooting. To obtain the accuracy required at 200 yards, the barrel would have had to be rifled. Jake knew that an octagonal barrel was stronger than the round barrels that were used on the the U.S. muskets, and as a bonus, it would add some weight to the rifle to lessen felt recoil.
Lock--I believe that Jake would have used a flint lock similar to or taken off one of the U.S. Springfield Model 1803 to 1821 models. They were large and dependable--using a large musket-sized flint to produce a massive amount of sparks. These locks utilized a reinforced hammer to strengthen the hammer, hereby giving a smaller chance of breakage with repeated, hard use.
Buttplate--I believe that Jake would have used a flat iron buttplate as was standard on the military models. A flat buttplate would have lessened the effects of felt recoil much better than the crescent-type buttplates used on Kentucky and later Hawken rifles.
Triggers and Guard--I believe that Jake would have wanted to incorporate a double-set trigger system on the rifle to enhance precise shooting at the longer distances. To accommodate the double-set triggers, an English-style trigger guard with a large bow was probably used.
Stock--The U.S. Springfield Model 1821 used a full-length stock with its 42” barrel. Jake would have given the stock a more Tennessee-type stock design with a thinner wrist to incorporate the double-set triggers, all in combination with a long tang for added strength. Either American walnut or maple would be suitable. A small patchbox similar to the 1803 Harper’s Ferry, but made of steel, would be appropriate for that period and for the Rocky Mountains!
In Part II, I will detail the construction of a rifle to match the known and proposed features of the Ashley Hawken.
This article was featured in Muzzle Blasts magazine in July 2017. A digital archive of Muzzle Blasts magazines from 1939 to present is available to all NMLRA members.
Muzzle Blasts on Instagram
NMLRA on Facebook
Top 10 things you need to know about your new Muzzleloader
If, like many of us Santa brought you a new Muzzleloader or muzzleloader kit, you’ll be spending the next few weekends tinkering with it. This list is brought to you courtesy of the NMLRA Facebook group to give you the best tips and tricks to break in your new muzzleloader safely.
#1 Read the manual
Whether you are familiar with modern firearms or not, muzzleloaders are a different animal.
We recommend that you read the manufacturer's manual that came with your new muzzleloader, if one is not available, please go online and find the digital version at your manufacturer’s website. Manuals will give you correct loading procedure and load data for your firearm.
If you have added a new custom built muzzleloader to your collection, be sure to communicate with the builder about safe load measurements. If your builder is not available, please reach out to some online forums or facebook groups and ask the folks there
#2 Don’t assume your local sporting good stores know black powder
It can be hard to find real black powder, but it is very important to remember that Pyrodex, Trip 7, etc is not blackpowder. We don’t advise ever using smokeless powder in your traditional muzzleloader. Smokeless Powder is more explosive than traditional black powder. Using Smokeless in your traditional muzzleloader can result in serious injury or death.
If you are having trouble finding real black powder in your area, as it is not carried in many gun shops or sporting goods stores, be sure to check out the list of authorized dealers from both Schuetzen Black Powder, and Goex Black Powder. NMLRA Members also receive a discount on black powder from both Goex and Swiss if you purchase on NMLRA Grounds.
#3 Keep your Powder away from your shooting area
It’s important to remember that any container holding black powder is highly explosive. Many newcomers make the mistake of leaving their black powder can near there firing position or bench, not realizing that a percussion or flintlock firearm can throw sparks around the area. If one of these sparks hits your powder can, you won’t want to be within 50 yards of it!
#4 Of all the laws you must recall. First the powder, then the patch and ball.
It can seem very simple, 3 steps between shots, nothing fancy, just a lot of ramrodding, but you’ll be surprised how often you can mix them up if you aren’t focused.
Always pay attention when you are loading your new muzzleloader, you don’t want to accidentally double load your powder, patch or your ball. It won’t just mess up your grouping, but it could seriously injure your rifle and you!
On our ranges though, the most often forgotten step in the powder, resulting in a fair amount of heckling as we work to pull the ball.
#5 Load Safely
Remember, you are handling an explosive powder each time you load your muzzleloader.
Never load a muzzleloader’s powder straight from your powder horn or powder can, always use a measure. This ensures a repeatable load for more accurate shooting, but it also keeps you safe from any rogue sparks that could ignite your powder.
#6 Mentorship
If you haven't been around muzzleloaders much it can be very daunting. Don’t hesitate to reach out to a local shooting club or gun shop for some help. We’ve got a list of Official NMLRA Charter Clubs as well as Field Representatives all over the United States that are trained to answer your questions.
Our facebook group is packed with over 4,000 members of all skill levels, reach out there anytime and you’ll receive many great responses.
#7 Is it loaded?
Like all firearms, it is paramount you behave that every muzzleloader is always loaded. If you aren’t sure, there are a couple steps you can follow to check.
Point the Muzzleloader in a safe direction
Flintlocks - Open the Frizzen and place the hammer in the down position.
Percussion Locks- Ensure there is no percussion cap or remains of a percussion cap on the nipple. Keep the hammer in the down position over the nipple or put the hammer on Half cock with a washer over the nipple.
Remove your ramrod and place it down the barrel until the ram rod cannot go in any further. Mark the spot on your ramrod flush the muzzle. We recommend a permanent marker or a piece of tape for accuracy.
Remove your ramrod from the barrel and place it alongside the barrel of your muzzleloader so the line you marked is in line with the muzzle, and the base is pointed back towards the area described below
Flintlock Firearm: The touch hole, or flash hole, located on the side where the ignition spark reaches the charge
Percussion Lock Firearm: The drum area, located on the side of the breech
In-line Firearm: The breech plug
You should be familiar enough with your firearm to know if there is a cavity in the breech plug that will allow powder between the rod tip and the flash hole.
If there is a cavity, check to see if it is filled with powder. Insert a .22-caliber ramrod, made of brass or other non-ferrous metal, into the bore until it stops.
Remove the rod, and measure along the outside of the barrel to see if the rod tip reaches the flash hole of the breech plug. If the rod reaches the flash hole, the muzzleloader is empty and has no projectile or powder in the barrel.
If a projectile or powder is inside the barrel, use a CO2 discharger to clear the barrel. Then reinsert the range rod into the barrel to make sure the projectile and all powder have been removed.
After you are certain the firearm is empty, insert the range rod back into the barrel. Make a permanent "unloaded" or "empty" mark on the rod at the spot where the rod exits the muzzle. You now can use this mark to verify whether the barrel is empty whenever the range rod is inserted.
#8 Cleaning your muzzleloader
You can find countless online forums and comment threads discussing how often to clean your muzzleloader. Should I clean after every shot? After an hour? After a day?
Well, there isn’t really a rule. Many of our competitive marksmen will clean their barrels after each shot to make sure each shot is as accurate as possible. If you are plinking at your home range, you can get away with a few shots before cleaning.
Like all modern firearms, it’s important to clean your muzzleloader well after each trip to the range. Swab down the barrel with your preferred cleaner and wipe down the exterior as well to prevent rust.
#9 Always do your research
Youtube is a great resource for just about everything on the planet, but when it comes to handling black powder, always triple check the information presented in the video.
We recommend this video from The Black Powder Maniac Shooter as a good starting point for a flintlock. Hickok 45 also has several good videos on muzzleloaders.
#10 Safety Safety Safety
We all know Eye Protection and hearing protection are important when shooting modern firearms, with muzzleloaders you’ll hear the same. Eye protection is especially important when shooting a sidelock muzzleloader, the ignition explosion on the exterior of the firearm, and near your face. Shrapnel from percussion caps or your flint can easily find its way into your eyes.
We hope this helps you get started in the world of muzzleloaders! We hope you’ll find your new muzzleloader one of the favorites of your firearms collection, I know we do here at the NMLRA.
